
New kid on the block
Posted by: count.d on 03 June 2009
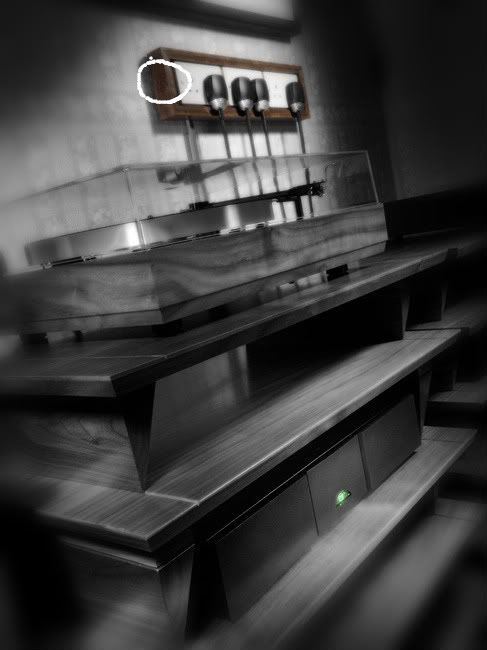
Pic.1.
Posted on: 09 June 2009 by DaveBk
Oh I don't know Adam... we could discuss the very fine woodwork. 
Posted on: 09 June 2009 by count.d
Give me some time to accumulate all the minute details for a final post or two.
Adam, I have warned the forum before, that when I enter the kitchen, most people suddenly find the best party in the lounge.
It does sound really good ......and I really mean that ...... in a really sort of surprised way.
Adam, I have warned the forum before, that when I enter the kitchen, most people suddenly find the best party in the lounge.
It does sound really good ......and I really mean that ...... in a really sort of surprised way.
Posted on: 10 June 2009 by 555
IWOOT
Posted on: 11 June 2009 by count.d
If we can meet back in this room after lunch.

Posted on: 12 June 2009 by Bruce Woodhouse
Count
Have you ever thought of trying to design and build a loudspeaker?
I know some people do this as a DIY project. Your impeccable craftmanship and design thinking would surely result in something very interesting indeed.
Bruce
Have you ever thought of trying to design and build a loudspeaker?
I know some people do this as a DIY project. Your impeccable craftmanship and design thinking would surely result in something very interesting indeed.
Bruce
Posted on: 12 June 2009 by Rockingdoc
Count
This is an excellent project, and I look forward to your appraisal of the sound from your plug-board.
Not sure about the colour scheme of your isoblue and that you have decorated your room though.
This is an excellent project, and I look forward to your appraisal of the sound from your plug-board.
Not sure about the colour scheme of your isoblue and that you have decorated your room though.
Posted on: 12 June 2009 by 555
quote:If we can meet back in this room after lunch
Fangs for the invitation. I was tempted, until I noticed this ...

Now I realise I was being sucked in.
Posted on: 12 June 2009 by Frank Abela
Count.d
It really looks beautiful. My initial reaction was 'Wow!'. I've since had a few thoughts and questions:
Can you explain why you chose to use those bus bars instead of rods or wires? I appreciate that they have high current capacity but the shape leads me to think they could be responsible for more eddy currents within the bars themselves.
Also, their proximity to each other as plates could be enough to make them into a small capacitor, couldn't it?
The Powerline plugs sit over the wooden surround. Are the plugs in contact at this point or are they free to float? Perhaps a chamfered edge to allow more movement might be in order?
I'm confused about your explanation of the isolation. If the CF backplate is isolated using soft silicon grommets, when the unit is hung on the wall vertically won't the body of the unit shift downwards and effectively couple the CF backplate to the unit again? I can't see how this can be avoided, given the weight of the unit and the softness of the grommets. I'd have thought the isolation could only work correctly if the unit were placed on the floor.
Just some thoughts on this very interesting subject. I love the quality of the workmanship and the obvious dedication it took to make it.
Posted on: 12 June 2009 by garyi
Good effects to hide the wall paper well played
It does look professional in place.
It does look professional in place.
Posted on: 12 June 2009 by count.d
Bruce, Doc & Frank, thanks for the kind words.
Bruce, I think if I designed a loudspeaker, it would be very interesting, but most likely sound terrible. I believe loudspeaker design is very complex, so I'll leave that to the experts Naim and Shahinian.
Frank, thanks for staying in the kitchen.
I chose to make bus bars instead of wire for the following reasons:
a) I could make the full circuit from one piece solid copper without any bends or twists that would destroy the flow of electrons. This was the main reason. The only slight twist was on the earth rail's legs to make them perpendicular to the bolts.
b) I couldn't source solid single core wire with a csa of 20mm+.
c) I couldn't source solid single core wire or bar made from C101.
d) I wanted the contact area of the links to be flat against the socket's flat (after being filed) brass ferrule. Flat against flat is so much more of a secure fastening and a better conductor.
e) The legs being solid and a rectangular 5x2mm at the entry point of the ferrule, take up minimum room and so allow easier insertion of the 10mm2 cable.
The sockets are precisely flush with the frame and the Powerline plugs don't touch. The floating part is 3mm away from the wood and free to move.

There are 8 silicon grommets holding the back plate and they're very supportive whilst remaining flexible. They are pretty thick in depth and have good wall thickness. They were a sod to source and expensive for what they are. The gap between the edge of the back plate and the wood frame is 2mm all round and it does stay like that even when mounted on the wall. The frame was made dimensionally as small as possible to keep the weight down (and look pretty) and even though it's made from heavy hardwood, the overall unit is surprisingly light. In hindsight, I made extra work and problems for myself by making the frame to such tight margins, but it all fits nicely and looks smart on the wall. I understand your reservation that it would sink down once mounted, but it was details such as grommet hole size (in back plate), sourcing the right grommet material and grommet quality that caused it to take so long to make. The stainless screws holding the backplate have had their threads removed under the heads, so they won't cut into the grommets.
With regards to the bars causing eddy currents, this is a bit of a grey area for me. I did understand (limited knowledge) that eddy currents wouldn't extend out particularly any more than round wire, from the flat face of the section, but from the edges and so the bars wouldn't interact with each other. As for acting like a capacitor, I understood that for a capacitor to be effective, the width of the plates have to be much greater than their separation. On my block, they're 13mm apart with 11mm wide plates. I don't know Frank, all I can say is in the Crabtree sockets, the existing connections are parallel flat brass bars, close together, so we're all doomed. I designed the whole unit to be made from wood so there would be no electromagnetic reflections within the frame.
The unit is 50" high from the floor which allows all the Powerlines to be lifted off the floor and hang down freely as designed. The proof in the pudding is in the listening and it's sounding extremely good. I feel the main benefit is not only coming from the clean and reduced electrical connections and better Powerline dressing, but the fact that my 300 is now receiving it's own supply within the double socket, instead of sharing with the 252.
Gary, the wallpaper is pink and aqua, and an embarrassment. Previous owner's decoration...honest!
Bruce, I think if I designed a loudspeaker, it would be very interesting, but most likely sound terrible. I believe loudspeaker design is very complex, so I'll leave that to the experts Naim and Shahinian.
Frank, thanks for staying in the kitchen.
I chose to make bus bars instead of wire for the following reasons:
a) I could make the full circuit from one piece solid copper without any bends or twists that would destroy the flow of electrons. This was the main reason. The only slight twist was on the earth rail's legs to make them perpendicular to the bolts.
b) I couldn't source solid single core wire with a csa of 20mm+.
c) I couldn't source solid single core wire or bar made from C101.
d) I wanted the contact area of the links to be flat against the socket's flat (after being filed) brass ferrule. Flat against flat is so much more of a secure fastening and a better conductor.
e) The legs being solid and a rectangular 5x2mm at the entry point of the ferrule, take up minimum room and so allow easier insertion of the 10mm2 cable.
The sockets are precisely flush with the frame and the Powerline plugs don't touch. The floating part is 3mm away from the wood and free to move.
There are 8 silicon grommets holding the back plate and they're very supportive whilst remaining flexible. They are pretty thick in depth and have good wall thickness. They were a sod to source and expensive for what they are. The gap between the edge of the back plate and the wood frame is 2mm all round and it does stay like that even when mounted on the wall. The frame was made dimensionally as small as possible to keep the weight down (and look pretty) and even though it's made from heavy hardwood, the overall unit is surprisingly light. In hindsight, I made extra work and problems for myself by making the frame to such tight margins, but it all fits nicely and looks smart on the wall. I understand your reservation that it would sink down once mounted, but it was details such as grommet hole size (in back plate), sourcing the right grommet material and grommet quality that caused it to take so long to make. The stainless screws holding the backplate have had their threads removed under the heads, so they won't cut into the grommets.
With regards to the bars causing eddy currents, this is a bit of a grey area for me. I did understand (limited knowledge) that eddy currents wouldn't extend out particularly any more than round wire, from the flat face of the section, but from the edges and so the bars wouldn't interact with each other. As for acting like a capacitor, I understood that for a capacitor to be effective, the width of the plates have to be much greater than their separation. On my block, they're 13mm apart with 11mm wide plates. I don't know Frank, all I can say is in the Crabtree sockets, the existing connections are parallel flat brass bars, close together, so we're all doomed. I designed the whole unit to be made from wood so there would be no electromagnetic reflections within the frame.
The unit is 50" high from the floor which allows all the Powerlines to be lifted off the floor and hang down freely as designed. The proof in the pudding is in the listening and it's sounding extremely good. I feel the main benefit is not only coming from the clean and reduced electrical connections and better Powerline dressing, but the fact that my 300 is now receiving it's own supply within the double socket, instead of sharing with the 252.
Gary, the wallpaper is pink and aqua, and an embarrassment. Previous owner's decoration...honest!
Posted on: 12 June 2009 by DaveBk
Great work as I've said before. I never throught a power bar could be a thing of beauty!
I very much doubt capacitance or eddy currents would be a problem on something like this. Given the distance the bars are apart the capacitance would be around 2pF - not enough to worry about with a 50Hz signal.
I very much doubt capacitance or eddy currents would be a problem on something like this. Given the distance the bars are apart the capacitance would be around 2pF - not enough to worry about with a 50Hz signal.
Posted on: 13 June 2009 by garyi
I'll admit it does look bloody smart especially with powerlines, makes me feel inclined to tidy up the mess behind my hifi.
Posted on: 13 June 2009 by count.d
Thanks Dave & Gary.
And there's more....

Dave, when you buy the Crabtree sockets (parallel linked) to replace your MK (series linked) ones there's a few points to note:
a) Check all four riveted connections (2 ferrules & 2 earths). I bought 20 Crabtree sockets for spares and testing and found 1 in 4 to be unsatisfactory. Having 20 of the things allowed me to test how much force the various threads could take, etc.
b) I gently nipped each copper U shaped receptacle with pliers, so it would be a slightly tighter fit on the plug pins.
c) As this block took so long to make, the long term effects of my finger prints on the copper bars could easily be seen. A nasty purplish tarnish, coated to reduce conductivity. Just before the final assembly, I cleaned every single piece of copper/brass (both sides) with 0000 wire wool, followed by acetone. I then assembled the unit with gloves and also avoided skin contact with the bare 10mm2 cable ends.
d) Screwing the socket to the wood: as the screw progressively gets tighter, it's difficult to know when to stop, because the plastic socket offers very little resistance. I heard a faint crack on the first one as I was doing it. Another one, I heard a faint crack from it 1 hour later from across the room, and another one cracked the next day! Reading this, you most likely think I'm heavy handed, but I'm not. You don't want a loose socket, but 1/6 of a turn too much and the socket will invisibly crack on the inside. Not a big problem, but I didn't want a cracked socket fitted. I found that gluing a nylon nut next to the hole (precisely flush and opposite to edge) on the inside, it strengthened the socket's structure so much, that it verged on becoming difficult to break one on my tests.

And there's more....
Dave, when you buy the Crabtree sockets (parallel linked) to replace your MK (series linked) ones
a) Check all four riveted connections (2 ferrules & 2 earths). I bought 20 Crabtree sockets for spares and testing and found 1 in 4 to be unsatisfactory. Having 20 of the things allowed me to test how much force the various threads could take, etc.
b) I gently nipped each copper U shaped receptacle with pliers, so it would be a slightly tighter fit on the plug pins.
c) As this block took so long to make, the long term effects of my finger prints on the copper bars could easily be seen. A nasty purplish tarnish, coated to reduce conductivity. Just before the final assembly, I cleaned every single piece of copper/brass (both sides) with 0000 wire wool, followed by acetone. I then assembled the unit with gloves and also avoided skin contact with the bare 10mm2 cable ends.
d) Screwing the socket to the wood: as the screw progressively gets tighter, it's difficult to know when to stop, because the plastic socket offers very little resistance. I heard a faint crack on the first one as I was doing it. Another one, I heard a faint crack from it 1 hour later from across the room, and another one cracked the next day! Reading this, you most likely think I'm heavy handed, but I'm not. You don't want a loose socket, but 1/6 of a turn too much and the socket will invisibly crack on the inside. Not a big problem, but I didn't want a cracked socket fitted. I found that gluing a nylon nut next to the hole (precisely flush and opposite to edge) on the inside, it strengthened the socket's structure so much, that it verged on becoming difficult to break one on my tests.
Posted on: 13 June 2009 by mjamrob
A beautiful and potentially effective piece of work count.d, it reminds me a little of an LP12 plinth in concept.
regards,
mat
regards,
mat
Posted on: 13 June 2009 by DaveBk
quote:Dave, when you buy the Crabtree sockets (parallel linked) to replace your MK (series linked) ones
I'll be sticking with my MKs for a while - at least until I redecorate the room, but this certainly gives food for thought